Tuesday 31 March 2009

And the Winner is..........................

I have now drawn the winner for my 'extra special' March blog candy. But before I do, I just have to say a huge THANK YOU!

To all those that entered and left such wonderful comments. So without further ado, the winner is...................................................

.......................................................

...............................................


........................................

..................................


Congratulations to Kerry, if you could email me (email on my sidebar) then I will get your candy out to you asap.

And as always I will be posting my new blog candy for April on Thursday this week, so don't forget to check back then for your chance to win!

Monday 30 March 2009

A Friend...........

My project for you today, uses one of the new stamp sets from Particraft - the unmounted 'Ladies' - I am making up a few projects with these ladies as I will be demo-ing and doing some make and takes with this particular set at Ally Pally on 18th/19th April '09, and I really do love this particular set!

For a quick run down on how I put this card together - well, stamp is 'Ladies' stamp set from Particraft, background papers are digi downloads from Sweet Shoppe Designs, Spellbinder nestabilities, Distress inks: Peeled Paint, Adirondack dabber: Lettuce, Sentiment from internet quote site, Basic Gray flourishes stamp stamped a-round the sentiment, Flower & ribbon embelishments from stash, Stickles for sparkle, coloured with watercolour and distress inks, white dots w/inkessential opaque pen and a crushed bottletop achieved with the wizard. Voila!

See you tomorrow - with the blog candy winner!!

Sunday 29 March 2009

One more Easter & a New Baby!....

Just a quick post today, as I've a few 'non-crafty' things that need doing before the week starts! My first project is another Toodles & binks stamp.

The papers are from the Sweet Shoppe Design collection, the flourishes background stamp is from Fancy Pants clear stamp 'Bella Blush', Nestabilities, glossy accents added to the egg, faux grass cut with 'fringing scissors'.

My next card is a New Baby card - which I am not too happy about, because I did not have any baby sentiment stamps (aaahhhhh!) except for the one in picture and it just didn't suit it, but I went ahead and stamped it anyway, and kind-a ruined it!!!!! - but I wasn't going to start again, and it just shows - mistakes happen!!!

Must make a note to myself to look for some new baby theme stamps at Ally Pally next month! - Background papers from Raspberry Road Designs - button embossing with cuttlebug folder, teddy bear image is stamp from Particraft which has been stamped onto acetate, coloured in circular motion with 3D crystal lacquer, cut out and glued onto white card - with added buttons, beads and ribbon embelishments.

Enjoy your evening - catch up with you tomorrow.

Saturday 28 March 2009

Its beginning to feel alot like Easter!........

Hi All, hope you are all enjoying your Saturday - I have managed to spend a couple of hours this afternoon in my craft room (although over an hour was spent just trying to tidy it up a bit!) and I have finished two more 'Easter' projects for you today, using the new stamps from Toodles & Binks.


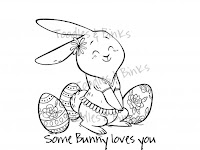
The first one is the bunny stamp from Toodles & Binks, I have used Sweet Shoppe Designs papers' and here is the finished card.


The second is the new 'Chick' stamp from T & B and again, the papers are from Sweet Shoppe Designs.


Well, thats it for today, I will be back tomorrow with a few more projects. Enjoy your Saturday evening lol.

Friday 27 March 2009

And here she is........

Here is the project that I was unable to show you yesterday.

The image is a new release from Toodles & Binks, the background papers are from Sweet Shoppe Designs I have coloured the image with copics - Im not really happy with how its turned out, but its all about trial and error - she says!!...... and I have added some glossy accents to the eggs which you probably can't really see in the picci, some faux stitching all around and the sentiment is also from Toodles & Binks.

I will have more samples for you, hopefully over the weekend!

And today is the final day to enter my 'extra special' blog candy - only a few more hours left, and I will then be preparing to do the draw and announcing the winner either Monday or Tuesday. Good Luck!

Thursday 26 March 2009

Easter Wishes!

Another quickie post today, as it is my wedding anniversary today (15 yrs!!!! - OMG that long!!!) and as both hubby and were at home, needless to say that today, I didn't get alot of 'craft' time - but I had a lavish lunch, some gorgeous cards from kids and other family members, all in all a really nice day!

BUT also, yesterday, I had two little cuties arrive on my doorstep - they are the two new designs from Toodles & Binks and they are adorable!!! - I did manage to make a quick project this evening, but wont be able to post it 'till tomorrow as whichever way I do it, I just cant seem to take a good picture! its late and the light is awful! - so sorry guys, I'll post it tomorrow.

AND dont forget, tomorrow is the last day for your chance to enter my big blog candy! - who will it be?????........................

Wednesday 25 March 2009

Twilight!......

I'm sharing something totally non craft related, but just thought I'd share this with you anyway.......As I mentioned, I was away for a while as I was unwell, and one of the things (or only thing!) that I managed to do was read.......I had been given by a good friend the 'Twilight' books - yes all four of them - I had them a while and just hadn't got round to reading any - I heard about the film, saw the trailer, meant to go see it, but didn't get round to that either!!!!! Anyway, I started reading Twilight (the first book in the series) and to cut a long-ish story short - I read all four books within 5 days - I have NEVER read so much in so little time!!!!!!!!!!!!!!!!!!!


To say I was hooked, is an understatement - I loved the books/story from start to finish and now I just cant wait to see the film which I believe is out on dvd on 6th April. If you're into the whole fantasy/Harry Potter type thing I believe you will love it!

Tuesday 24 March 2009

Back to the land of blog...........at last!!

Im so sorry for having been away for so long, but unfortunately I was really unwell, but glad to say that I am now back on form! - Thank you to all who stuck by and for those that sent me emails regarding my whereabouts and subsequently your good wishes - it's truly touching! - Thank you. I will try to get back to everyone to answer your questions asap!

Of course, when I did get back in form, the amount of neglected chores were a liitle overwhelming i.e. housework - ironing - kids - work - which I'm glad to say that I have now also caught up with, so now Im left with catching up with my blog, some dt work and also co-ordinating the Particraft stand at the Big Stamp & Scrapbook Show at Ally Pally on 18/19 April '09! - I do hope that some of you will get chance to come along and say hi, as it would be great to meet you in person - but I will post about this again nearer the time.

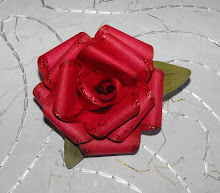
I do have a quick project to show you, which uses one of the new stamp plates from Particraft, which I will also be running a demo/m+t workshop at Ally Pally. It is a 'ladies' unmounted A5 plate and this particular lady is my favourite! I have added my paper rose to it too - and thank you all so much for the wonderful comments that you left me about my tutorial - I'll be sure to get some more together for you shortly - but first let me get Ally Pally out the way!

And just on a final note.......An Award!, I just wanted to share this award with you that was given to me by Cardmaking Galore, it was such a pleasant surprise - It is so great to know that you like to read my blog and that it inspires you. This fab award is given to blogs which:
- inspire you
- make you smile and laugh
- or maybe gives amazing information
- a great read~ has an amazing design
- and any other reasons you can think of that makes them uber amazing!

The rules of this award are: Put the logo on your blog sidebar or post. Nominate at least 5 blogs (can be more) that for you are Uber Amazing and let them know. Share the love and link to this this post and to the person you received your award from!

It's not easy to list merely 5 people as there are so many of you out there who do all of the above, but here are 5 ladies(and a gent) that I have selected:

Valem, Pam, Becki + Alan, Lynne, Lynsay

Monday 16 March 2009

Strength, Cure, Hope!

Just a quick post for you today, of a project that I have put together for a workshop that I have coming up this week, the group will be making this card and gift box and selling them on at a church event to raise money for breast cancer.


The template I used for the bag was a template that I picked up from a craft magazine, I have decorated the bag inside and out, and added a small velcro piece to easily open and shut - the stamps are Magnolia's 'Tilda with rose' and the circle sentiment stamp is also from Magmolia. The papers are a digi download from Raspberry Road Designs called 'Alive & Kicking' - perfect for obvious reasons. I made one of my paper roses from the same papers and have also added a bottle top embelishment to the gift bag which has been squashed with the wizard machine and then coloured with alcohol inks, the small bead on the card was also coloured with alcohol inks to match.

I will let you know how they turned out and how much the ladies managed to raise.

Thursday 12 March 2009

Paper Flower Tutorial

I have been asked many times to show how to make this very simple flower tutorial, I actually saw a similar-ish one being made a few years ago, when I attended a small local crafts event and when I came home, got straight to making my own version (so that I wouldn't forget) I adjusted it here and there adding my own tweaks to it. I've been making them ever since for projects (for example recently here) and workshops and now finally, Ive put it in writing (and pictures) and alas my paper flower tutorial is born!!

I have witten step by step notes and taken lots of pictures to match, in the hope that it fully explains and covers it, but email me if you have any probs. or need me to explain further. You can also click on the picture to enlarge it. So here goes.....

*******************************
1. Here are the main materials you will need; paper – I have used just plain red construction paper (of course you can use any colour!), dries clear glue, large 6 petal flower punch (or any six petal shape, sizzix, craft robo etc etc), glitter or stickles glitter, Fired brick distress ink pad, small piece of cut ’n dry foam and a cocktail stick (image 1)


2. Punch out 3 of the flower punch, make folds in them as in the picture to obtain the center (image 2)


3. In the first flower, just snip down the side of one of the petals to the middle, in the second flower punch cut away one petal and in the third flower cut away 2 of the petals (image 3)


4. At this stage using your cut ‘n dry foam with the fired brick ink pad, distress all the flower petals around the edges (image 4, 5)


5. Then using your dries clear glue, place some glue onto one of the petals of each of the three flowers and glue one petal over the other as in the picture - make sure you do this on the wrong side of the petals so that when they are glued down you do not cover the sides you have just distressed - (image 6,7,8)


6. Using your cocktail stick, curl all of the petals of each flower, of which there should be 3 (image 9,10,11)


7. You will now need to snip pointy ends off the two smaller flowers – do not snip the biggest flower as this is your base flower (image 12,13,14)


8. Then take the largest flower and add some dries clear glue to the middle, place the next size down flower and place on top, again, place some dries clear glue to the middle of that and place the smaller flower on top and just hold them in place a few second for the glue to adhere. (image 15,16,17,18)


9. With the two petal (i.e the heart shaped piece) again with the cocktail stick curl the petal edges and then keep one curled but, straighten out the other (image 19,20)


Now bring the shape together to make a funnel shape, but not too tight (image 21)

and place some clear dries glue to adhere the edge in place (image 22,23) (if at this stage the straight side of the petal is too straight, using your cocktail stick just gently curl that petal)

and as before snip the pointy end off (image 24)


10. Finally for the single petal, using the cocktail stick, curl the petal at the sides this time (image 25,26)


and also snip the pointy end off (image 27)

and place it in the middle of your flower, securing it in place with some dries clear glue as before (image 28)


The rose is almost complete, now for the final touches.


11. Cut out two leaves either with a die cut, or a punch or even draw it by hand and cut it out, I have used my wizard flower set die in this instance, but any similar leaf shape will do (image 29)

with a bone folder give the leaf some shape (image 30)

decide where you want to place them add some dries clear glue and adhere them in place (image 31,32,33)


12. And finally take your stickles glitter and randomly place some around the petals or even add some dots of glossy accents to resemble raindrops (image 34,35)


YOUR FLOWER IS COMPLETE - now you have the basis of constructing you can adapt it to suit your projects, I have made smaller ones, different colour, different papers i.e patterened & tissue papers, distress some of the petal edges with a distress tool for a worn look it goes on and on......


I do hope you enjoy this tutorial, I would love to hear your comments and what you think about it, and I'd absolutely love to see any of your projects created with this tutorial.
Blog Widget by LinkWithin